
I have been having trouble with starting my engine, in particular with Starter Motors actually dying for no apparent reason. It was suggested to me that there may be a problem with my ignition switch kind of sticking after the release of the key turn. So, I decided to change this, it probably has not been replaced in the 40 years of the Bus’ existence, so why not? How hard can it be? Well it turns out a little tricky actually. Hopefully the guide below will help you if you ever have to do this, or change any part of the steering column and controls.
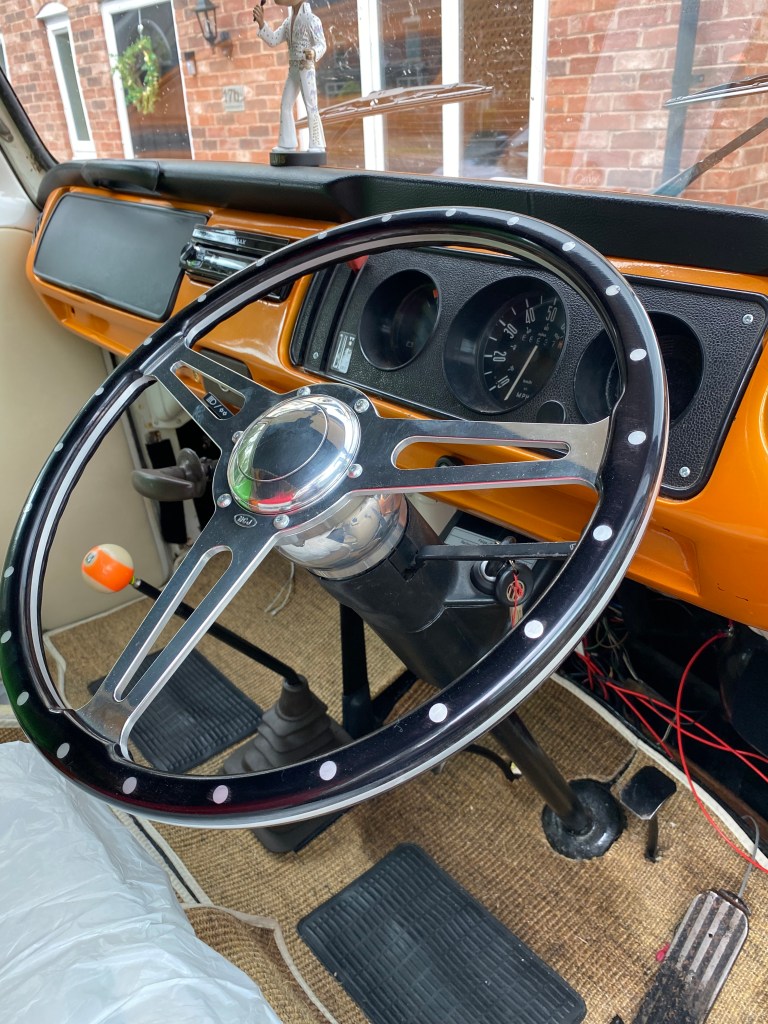
This is our starting position, before you start ensure that you have disconnected the battery, we do have to play around with the electrical connectors, better safe than sorry! I have a fancy after market steering wheel, however the principle in removal of stock does not differ too much. Firstly I had to remove the horn switch, for this it was a simple grub screw. You will then be presented with a single wire for the horn.
Next remove the steering wheel by removing the 6 hex nuts, if you have the stock wheel you will not need to do this.

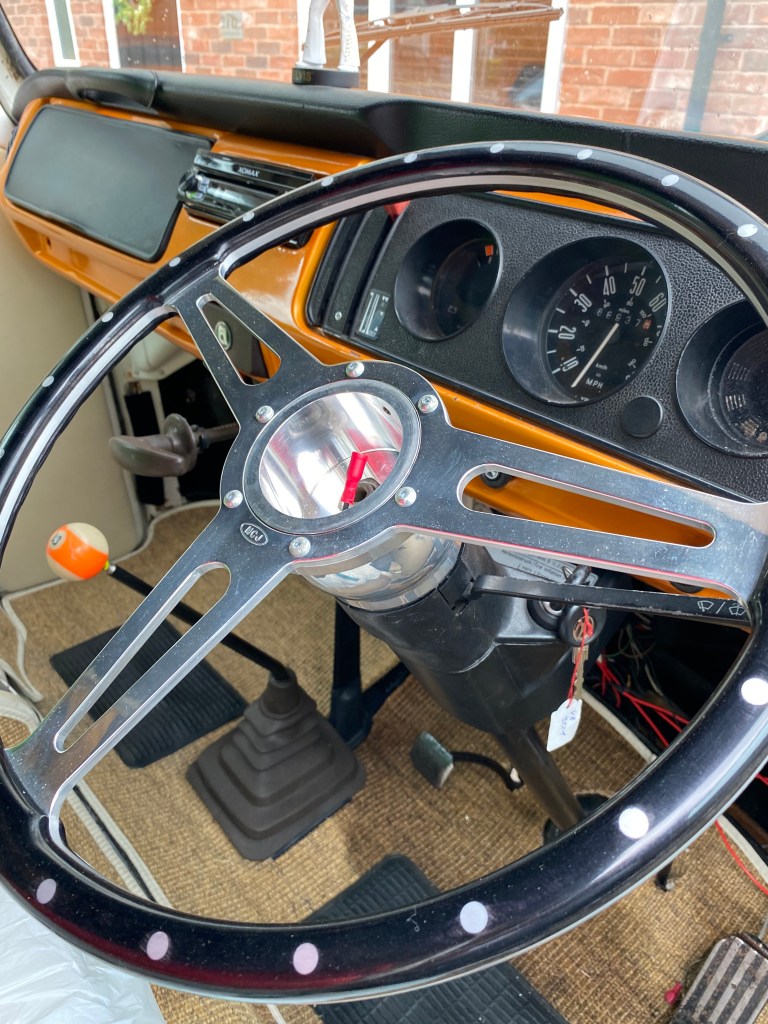
Next you need to remove the large nut that holds either the steering wheel boss to the column or in the case of the stock wheel, the wheel itself. I soaked the whole thing in PB Blaster before this and it was removed fairly easily with a wrench and extender bar. One thing I did do was to ensure the steering lock was engaged.

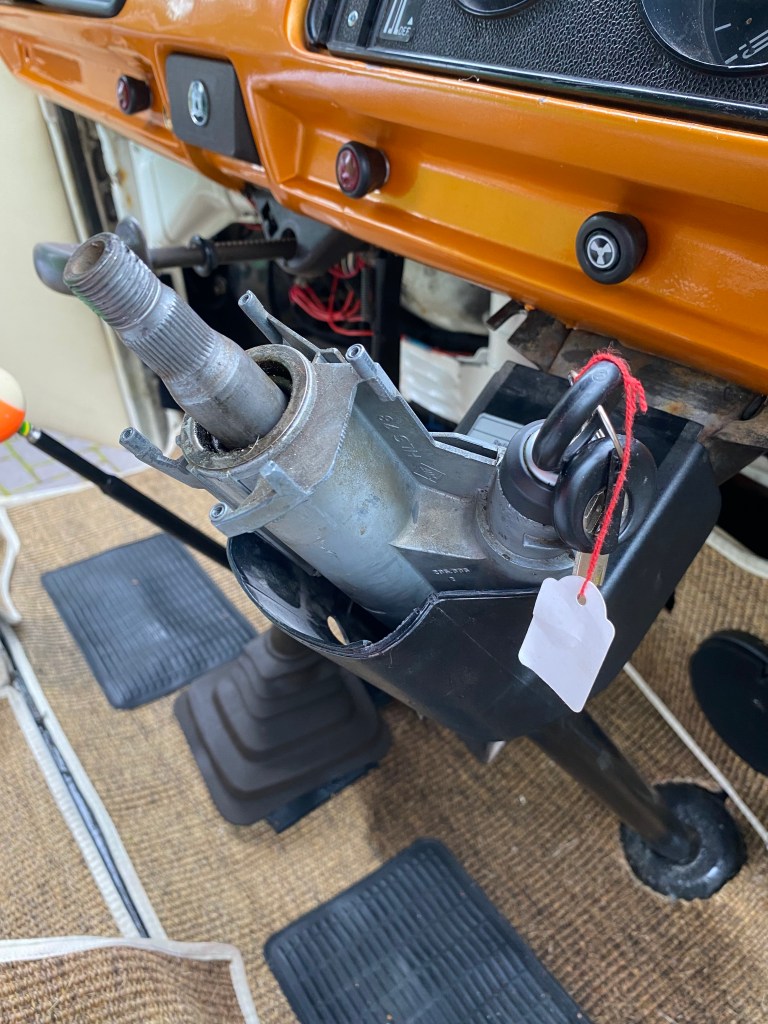
You are now left with the control stalks. You will notice on my image that the plastic cowl is absent, this is because a PO did not know the procedure of removal and cut this section off. I have a replacement now and it will be going on at the end. To remove the stalks firstly remove the connectors that supply current to indicators, washers and flash relay, you may as well pull the cable for the ignition at the same time. To do this simply pull from below. Be careful not use to much force here! Once disconnected, remove the 4 screws you can see I am pointing to with the driver in the picture above. Now lift – gently!

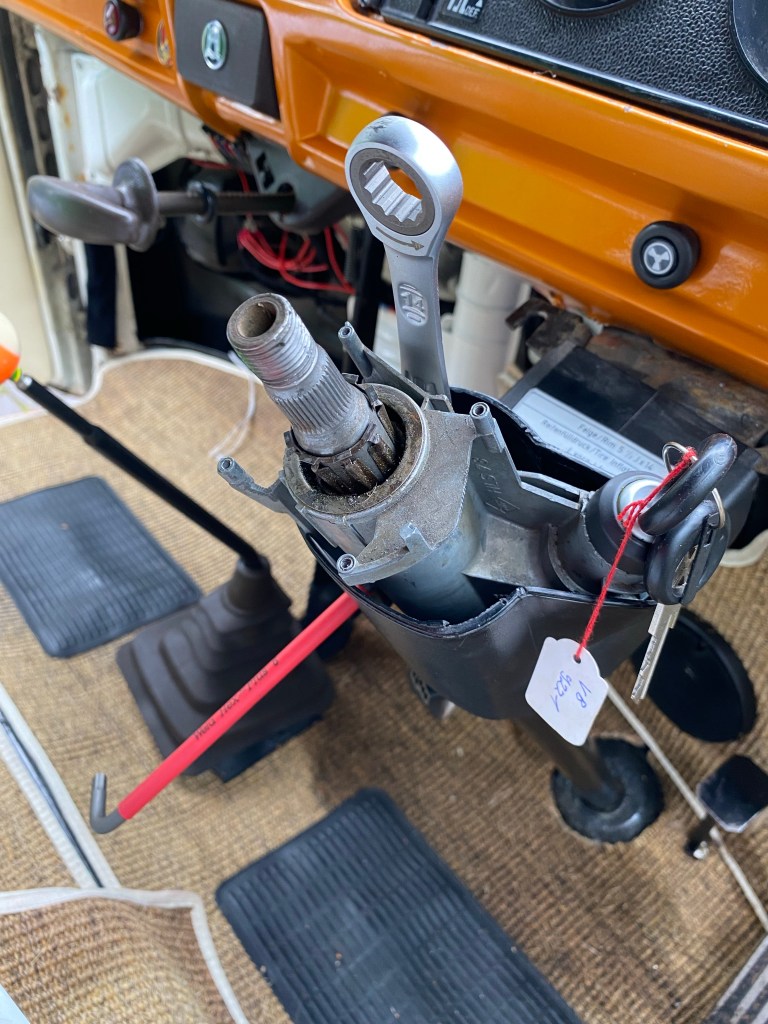
Next is removal of the lock mechanism housing and lock barrel. Undo the bolts that hold the column to dash and under the windscreen. You can now pull the whole column forward to make the next stage a little easier. Ensure the key is turned to disengage the steering lock. There is also a hex bolt that needs to be loosened here, you can access this via the hole in the plastic cowling.
You should now be able to pull out the whole unit. In my bus this was veery difficult and took a lot of force to remove. Be extremely careful with the housing, it is aluminium and quite fragile. If damaged they are quite hard to come by!

You should now be left with the whole unit removed and the remaining plastic cowling can be pulled off. In the picture I am pointing the insert for the steering lock so you know where to align things on replacement.

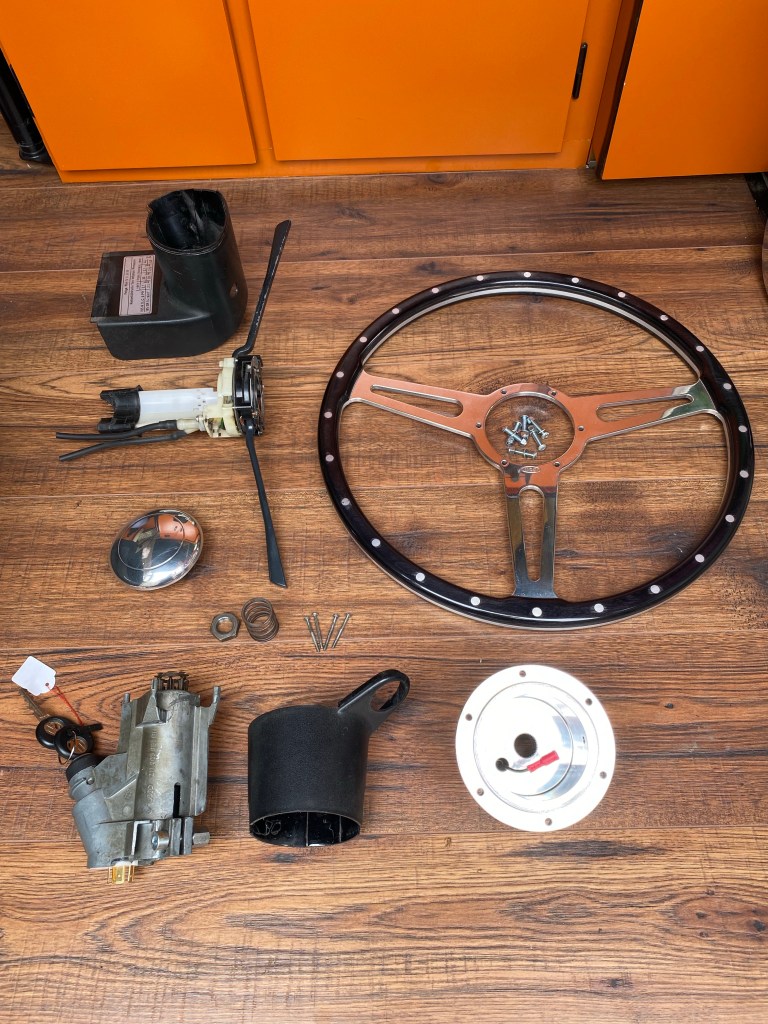
Removal done! All of the parts removed are inn the picture below.
Installation is the complete opposite – time taken for both removal, barrel change and installation around 3 hours. Details for changing the barrel itself below. Get your drill ready!
